


So your friends have all been going on about how they are using their smokers this weekend for the 99 cents a pound for pork deal on social media, but you are stuck with just a gas grill on the porch and want to get in on the action. What is one to do?
Well run on down to the grocery store and pick up your favorite cut of meat to smoke, because I’m about to provide you with a bit of a trick that you can use at home (relatively safely, but with cautions and warnings involved) to get your discount purchases the right flavor you desire and show off for the weekend as well.
Don’t run out and spend a ton of money on a fancy smoker. Just follow these simple steps to get your grill ready for a few hours of work in no time.
Step 1: Fill in your vents

Ok, look. This is again for someone who doesn’t want to spend the money and time trying to buy a smoker last minute. And there’s a ton of options out there for people to try: pellet-based gas smokers, those awesome 55-gallon drum conversions, the ones that look like giant ovens and can cook off multiple types of meat at one time.
All of these are better options than what I’m proposing. This is for the last minute backyard grill master who does well with hamburgers, hot dogs and the occasional steak.
So with that caveat out of the way, your first step is going to be filling in your vents.
If you don’t plan to use a pan to cook your favorite meat in (I wouldn’t suggest it with ribs, for instance, let those remain right on the grill top) then make sure that you have something the grease can drip in/onto for this to make the least amount of mess to clean up later. I used aluminum foil to cover the bottom vents, and made a sheet folded together to cover the back vents.

It is crucial to make sure that a majority of your vents are covered up, but leave some for smoke to escape. You want the flavor as much as you want the meat to cook through.
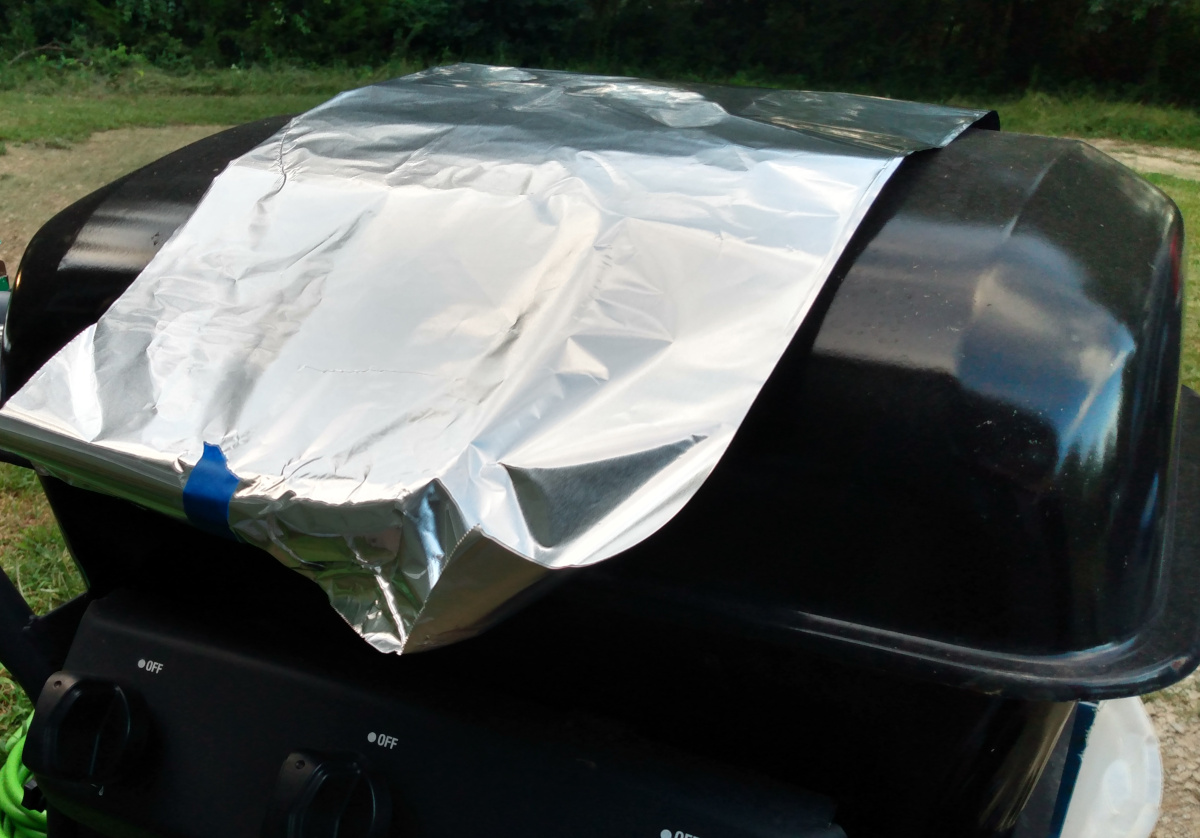
I added a piece that sits over the grill and provides an extra layer to keep the smoke inside the grill as much as possible. You can use painter’s tape on each side to help keep the topmost piece stuck where it should be in relation to the vents on the back grill.
It should look something like the next photo below, and if you’re doing it right akin to something like a shiny Christmas present under the tree that is obvious as to its purpose.

Step 2: Prepare your wood chips


Whether you decide to soak your wood chips prior to placing over one of the gas burners on your grill to give them time to heat up is debatable, but I chose to in order to also give the pork butt I purchased for this barbecue experiment time to rest with a good layer of flavoring (brown sugar bourbon mix from McCormick’s Grill Mates seasoning line with garlic powder) covering the pork butt before it goes on the heat.
Set the wood chips on the lowest possible temperature if you don’t soak them, and if you do crank it up a bit to allow some of the moisture to boil off. Not all of it. You still want some moisture in there to help keep the chips from burning up too fast.
Either way, when you begin to see smoke coming out of the lone vent left open it is time to cook.
Step 3: Get the heat right
Turn down the heat to the lowest possible setting for at least the first hour, then add some wood chips to ensure that they aren’t all ash before this adventure is done. Depending on how you like your barbecue (I’m a fan of burnt ends and crispy bits) then you’ll need to adjust your heat for the amount of time you want to spend cooking.

I let this particular piece we cut into three chunks (two for later) for around 2 hours, and at Jess’s bequest added sauce about 45 minutes before taking it off. Don’t let your heat go too long, or you’ll let your barbecue dry out more than a Thanksgiving turkey roasted for too long in a conventional oven. (Deep frying is the best for Turkey, in my opinion. I’ll save that for the holiday.)
I will write this again, but I want to make sure you understand: you need to make sure that when you’re dealing with pork and chicken, you cook it thoroughly. That means the thickest part of the meat you select if pork or chicken must be between 160 to 165 degrees Fahrenheit before it is finished. (Beef should be 160 degrees for well done, around 140 if you want it a little bloodier than that. Don’t quote me on rare…)
When you do, you can let the meat cook for another 30 minutes or so, depending on the number of pounds you’re cooking. The bigger the piece of pork or beef, the longer it will take to reach that internal temperature.
Step 4: Let it rest, then enjoy!

Now look at how nicely this piece of pork turned out. All with a gas grill, a bit of MacGyver ingenuity with household items and boom! Barbecue pork for Labor Day weekend.
Jess and I turned our weekend creation into barbecue tacos, but this technique can be used for all kinds of delicious meals. Have you tried smoked beer can chicken? (You’re missing out if you haven’t.) How does a smoked standing rib roast sound for your next holiday gathering? With the right wood chips, temperature and time, backyard smoking with this last minute option is right within your reach.
Remember: You want to check to ensure that your meat has reached 160 to 165 degrees Fahrenheit in the center (you can check this by purchasing a simple meat thermometer from Walmart or Kroger, your choice) to ensure it is well cooked throughout. When it reaches that temperature, cut off the gas and you should have good smoking chips in your pan by now.
Happy Labor Day to all the barbecue masters and backyard grillers at home enjoying the weekend!


Leave a Reply